Hello.
Finally, finally, I am back again!
It feels very odd to write these lines after having been absent for such a long time. It is such a strange feeling but I am very happy to write this post in order to overcome my writer's block. There are many delicious spring recipes waiting for you in the next few weeks and I am really looking forward sharing these with you.
Today I am sharing a matcha cherry mousse cake recipe which I meant to post during the Sakura Cherry Blossom Season. My matcha mousse cake creation was inspired by the arrival of spring and the appearance of green and pink in nature. Even though it is not the beginning of spring anymore, each day is a day is a celebration of a new beginning.
I love the combination of cherry flavor and matcha green tea; I think both flavors go so well together, given you like green tea. Green tea is one think that I cannot live without. I always start my day with a cup of green tea and I am a having a little bowl with matcha tea with a praline every single day. It gives me a moment to relax.
I hope you will enjoy these delicious mousse cakes as much as I do. Enjoy the spring time and soon there will be a new recipe waiting for you, my dear reader.
Marianne
xx


Makes 12 little cakes ( 7 cm / 2.8 inches in diameter)

CHERRY MOUSSE

  • 30 g / 2 tablespoons heavy cream
  • 15 g egg yolk (equals egg yolk of a medium sized egg)
  • 5 g / 1/2 tablespoons granulated sugar
  • 65 g / 1/ 4 cup sour cherry purée
  • 1 sheet (1,5 g) gelatin, soaked
  • 70 g / 1/4 cup and 1 tablespoon heavy cream
  • In a small saucepan, bring the heavy cream (30 g / 2 tablespoons) almost to a boil. Set aside. 
  • Whisk egg yolk and and granulated sugar creamy. Add the hot heavy cream to the egg mixture and stir well. Pour the mixture back to the saucepan and heat the mixture - stir constantly - until it has reached 82 °C / 180 °F. Remove the saucepan from the heat. 
  • Add the cherry purée and the soaked gelatin and stir well. Pour the mixture into a medium sized bowl and let it cool down to room temperature. 
  • Whip the heavy cream (70 g / 1/4 cup and 1 tablespoon) until creamy. Fold the whipped cream into the cherry mixture. 
  • Pour the mixture into small (silicone) moulds (3 cm / 1.2 inches in diameter). Place the moulds in the freezer and let the cherry mousse freeze for at least 1 1/2 hours or until completely frozen.

CHERRY JELLY

  • 150 g / 1 /2 cup and 2 tablespoons sour cherry purée
  • 10 g / 1 tablespoon granulated sugar
  • 1 2/3 sheets (2,5 g) gelatin, soaked
  • Add 1/3 of the cherry purée and the granulated sugar into a small saucepan and heat the mixture. Remove from the heat, add the soaked gelatin and stir until the gelatin is completely dissolved. Add the rest of the cherry purée and mix well. 
  • Pour the cherry jelly on top of the frozen cherry mousse cores. Freeze the moulds again for at 
  • least one hour or until completely frozen.

ALMOND SPONGE CAKE

  • 30 g / 5 tablespoons almond flour
  • 20 g / 2 1/2 tablespoons powdered sugar
  • 50 g / 1 egg (medium size)
  • 15 g egg yolk, equals egg yolk of a medium sized egg
  • 30 g egg white, equals egg white of one medium sized egg
  • 1 pinch of salt
  • 25 g / 2 tablespoons granulated sugar
  • 35 g / 5 1/2 tablespoons pastry flour
  • 15 g / 1 tablespoon unsalted butter, melted
  • Preheat the oven to 180 °C / 355 °F.
  • Line a baking sheet with parchment paper. 
  • Place the almond flour, powdered sugar, egg and egg yolk in a medium sized bowl; whisk until creamy. Add about 2 tablespoons of the batter to the melted butter; mix well and add the butter mixture to the batter. 
  • Place egg white and salt in a small bowl and whisk until almost stiff. Gradually add the granulated sugar and whisk until stiff. 
  • Fold the egg white into the almond flour and egg mixture. 
  • Spread the batter (the size of 30 cm x 30 cm / 11 inches x 11 inches square) onto the baking sheet.
  • Bake the sponge cake for 7 to 8 minutes or until the cake is golden in color. 
  • Let the sponge cake cool completely on a wire rack. Carefully remove the parchment paper. Cut out circles with a cookie cutter (7 cm / 2.8 inches). 

MATCHA MOUSSE

  • 150 g / 1/2 cup and 2 tablespoons heavy cream
  • 50 g  / 1.5 ounces white chocolate, finely chopped
  • 30 g egg yolks (equals egg yolk of a medium sized egg)
  • 10 g / 1 tablespoon granulated sugar
  • 6 g / 1 tablespoon matcha powder
  • 2 2/3 sheets (4 g) gelatin, soaked
  • 200 g / 3/4 cup and 1 tablespoon heavy cream
  • Pour the heavy cream (150 g / 1/2 cup and 2 tablespoons ) into a medium sized saucepan and bring it almost to a boil. Remove from the heat. 
  • Mix the egg yolks and the sugar until creamy. Pour the hot heavy cream to the egg mixture and mix well. Pour the mixture back to the saucepan and and heat the mixture - stir constantly - until it has reached 82 °C / 180 °F.  Remove the saucepan from the heat. 
  • Add a little bit of water to the matcha powder and mix well; make sure that there are no lumps. 
  • Add the matcha paste and the finely chopped white chocolate to the egg mixture and stir well. Add the soaked gelatin and mix well until well combined. 
  • Pour the mixture through a sieve into big bowl and let the mixture cool down to room temperature. 
  • Whisk the heavy cream until creamy. Fold the heavy cream into the matcha mixture. 
  • Place hemisphere moulds (7 cm / 2.8 inches in size) onto a plate. Fill the moulds 2/3 with the matcha mousse. 
  • Unmould the cherry core, gently press the cores into the matcha mousse and place the sponge cake circle onto the top. 
  • Freeze the mousse cakes for at least 6 hours or overnight. You can keep the frozen mousse cakes in the freezer up to a month. 

MATCHA GLAZE

  • 105 g / 3 ounces white chocolate, finely chopped
  • 50 g / 1/4 cup granulated sugar
  • 110 ml / 1/3 cup and 2 tablespoons water
  • 105 g / 5 tablespoons liquid glucose
  • 70 g / 5 tablespoons crème double, alternative heavy cream
  • 5 g / 1 tablespoon matcha powder
  • 10 ml / 2 teaspoons water
  • 4 2/3 sheets (7 g) gelatin, soaked
  • Place water, granulated sugar and glucose in a saucepan. Bring the mixture to a boil over high heat and let it boil until it has reached the temperature of 103 °C / 217 F°. Remove from the heat, add the gelatin and crème double and mix. Place the chopped white chocolate in a bowl and pour the hot mixture over the chocolate. Stir until the glaze is smooth. Pour the mixture through a sieve. 
  • Pour the glaze into a jar and let it cool to room temperature. Cover the jar with a lid and store it in the fridge. You can keep the glaze in the fridge up to five days. 

ASSEMBLING

  • Place the matcha glaze into a pot - it has a thick consistency - and gently reheat the glaze,
  • Unmould the matcha mousse cakes and place the frozen cakes on a wire rack (place a deep plate under the wire rack in order to catch the excess glaze). Pour the glaze over the frozen cakes. It it important that the mousse cakes are frozen while glazing the cakes. Moreover, it is important as well that the glaze is not too hot. The temperature of the glaze should be around 35 °C / 95 °F.
  • Carefully place the mousse cakes onto cake boards. Decorate the cakes to your liking.
  • Let the matcha cakes defrost in the fridge and keep the cakes in the fridge until consumption. 
  • Bon appétit!


One of my favorite part of making French inspired cakes is unmoulding and glazing the cakes. It is always such a satisfying moment seeing the final touches of a cake coming together and it fills me - every single time - with happiness. This applies to caramel, too.
On my last Paris trip I indulged into Sadaharu Aoki's Tarte Caramel Salé Matcha and I rediscovered the deliciousness of caramel. I started to make caramel more often and I found so much joy in making caramel. This was not always like that. I remember my first attempt making caramel ( I wanted to make a tart tartin) years ago and I was quite frustrated. I could not figure out how to melt sugar properly and I was left with sugar lumps. It was a mystery to me and it took me a while how to work with sugar. It is not that difficult if you follow a few simple rules which includes patience (it takes time to melt the sugar) and not stirring while the sugar is melting since this changes the temperature of  the sugar and this means that it takes longer to melt the sugar. If you have never made caramel and the first attempt does not work out, do not be discouraged. Try again and you will be rewarded with a luscious caramel and there are many delicious way to make use of the caramel such as my caramel hazelnut mousse cake that I want to share with you today. I do not have many words for this cake but it is one of my top five favorite cakes that I have ever made (one of my favorite recipe is my caramel apple vanilla mousse cake). The caramel flavor goes so well with the hazelnuts, the caramel mousse is light and creamy; and it is a wonderful contrast to the caramelized hazelnuts. It is simply a luscious caramel dream cake. 


Makes 6 cakes ( 6 cm / 2.4 inches in diameter)

TART SHELLS

  • My tart shell recipe is here which is a recipe by Cheryl Koh. I have written here a blog post about my tips on making tart shells. 
  • You can make the tart shells in advance. In fact, I always a few tart shells on hand which I keep in an air-tight container. 

CARAMEL MOUSSE

  • 130 g / 1/2 cup and 2 tablespoons granulated sugar
  • 60 g / 4 1/2 tablespoons salted butter, cut into cubes
  • 200 g / 3/4 cup and 2 tablespoons heavy cream
  • 1 1/2 gelatin sheets (2,25 g), soaked
  • Pour the sugar into a medium sized saucepan. Over medium-high heat, let the sugar melt. Do not stir the sugar at this stage in order to avoid sugar lumps. As soon as the sugar starts melting, switch the heat to low medium heat.
  • As soon as the sugar is completely melted and is golden in color, remove from the heat. Make sure that the sugar does not get too dark, otherwise the caramel will taste bitter, and if the caramel is too light, it taste very sweet. 
  • Carefully pour 100 g / 1 /3 cup and 1 tablespoon of the heavy cream to the melted sugar and stir constantly. Add half of the butter cubes and mix well. Place the saucepan back to the heat (medium heat) and stir until the caramel is smooth. As soon as the caramel is smooth, remove from the heat, add the rest of the butter cubes and mix well again. 
  • Divide the caramel into half (you need the other half later when assembling the cakes). 
  • Add the gelatin into one half of the caramel and stir until the gelatin is dissolved. Pour the caramel to a medium sized bowl and let it cool to room temperature. 
  • In the meantime, whip the remaining heavy cream until creamy. 
  • Fold the whipped cream into the caramel. 
  • Pour the mousse into 6 moulds. I use a silicon muffin moulds and fill the moulds until 3,5 cm / 1.4 inches high.
  • Freeze the moulds for at least 8 hours or overnight. 

CARAMELIZED HAZELNUTS

  • 110 g / 3/4 cup hazelnuts
  • 100 g / 1 /2 cup granulated sugar
  • Preheat the oven to 150 °C / 300 °F. 
  • Place the hazelnuts on a lined baking sheet. Roast the nuts for 15 to 20 minutes. 
  • Remove the skin of the nuts by rubbing them in a kitchen towel. Set aside 6 nuts for decoration. 
  • While rubbing the skin of the nuts, melt the sugar in medium sized saucepan. As soon as the sugar is melted (follow the steps written above in the caramel mousse), remove from the heat. Add the roasted hazelnuts to the melted sugar and stir well. Place the caramelized hazelnuts on a baking paper (be carefully it is very hot!) and quickly separate the nuts with the help of two forks. Let the nuts cool completely. Set 60 g of the caramelized hazelnuts aside and cut the nuts into halves. 
  • Place the rest of the caramelized hazelnuts in a food processor and blend until it becomes a smooth noisette paste.

NOISETTE WHIPPED CREAM

  • 25 ml / 2 tablespoons whole milk
  • 20 g / 1 1/2 tablespoons noisette paste
  • 3/4 sheet gelatin (1 g), soaked
  • 65 g / 1/4 cup heavy cream
  • Place the milk and the noisette paste in a small saucepan and heat the mixture. Remove from the heat, add the soaked gelatin and stir until the gelatin is dissolved. Pour the noisette mixture into a medium sized bowl and let it cool to room temperature. 
  • Whip the heavy cream until creamy. Fold the heavy cream into the noisette mixture. 

ASSEMBLING

  • Place a dollop of caramel onto the bottom of each tartlet shell. Use only a little bit of caramel, otherwise it gets too sweet (in my opinion).
  • Distribute the caramelized hazelnut halves onto the tartlet bottoms. Spread the noisette whipped cream on top of the nuts and smooth out the surface. 
  • Unmould the frozen caramel mousse and carefully place the mousse on top of each tartlet. Decorate each cake with a roasted hazelnut. 
  • Place each cake on a cake board and let the cakes defrost in the fridge. The cake taste best on the day you assemble the cakes (the next day the tart shells get a little bit soft).


I like the park of the Nymphenburg Palace a lot and I often go for a walk there (avoid Sundays, there are too many people). Every season is beautiful but winter is my favorite season in the park. Most of the time, I just go for a walk in the park but once in a while I visit the café on the grounds of Castle Nymphenburg. Back in January, I went to the café after my park walk and I ordered a pot of tea and a slice of the König Ludwig torte. I recreated this cake last year (to my delight, the café modified the torte; instead of a sponge cake bottom the torte consists of a shortcrust bottom, just as I suggested). After I paid the bill, the waitress brought me a little dessert cup with a crème bavaroise topped with a raspberry ragout as a thank you because of a two month winter break of the café. It was literally a very sweet gesture. After my café visit, I craved Bavarian cream and raspberries for days and days.
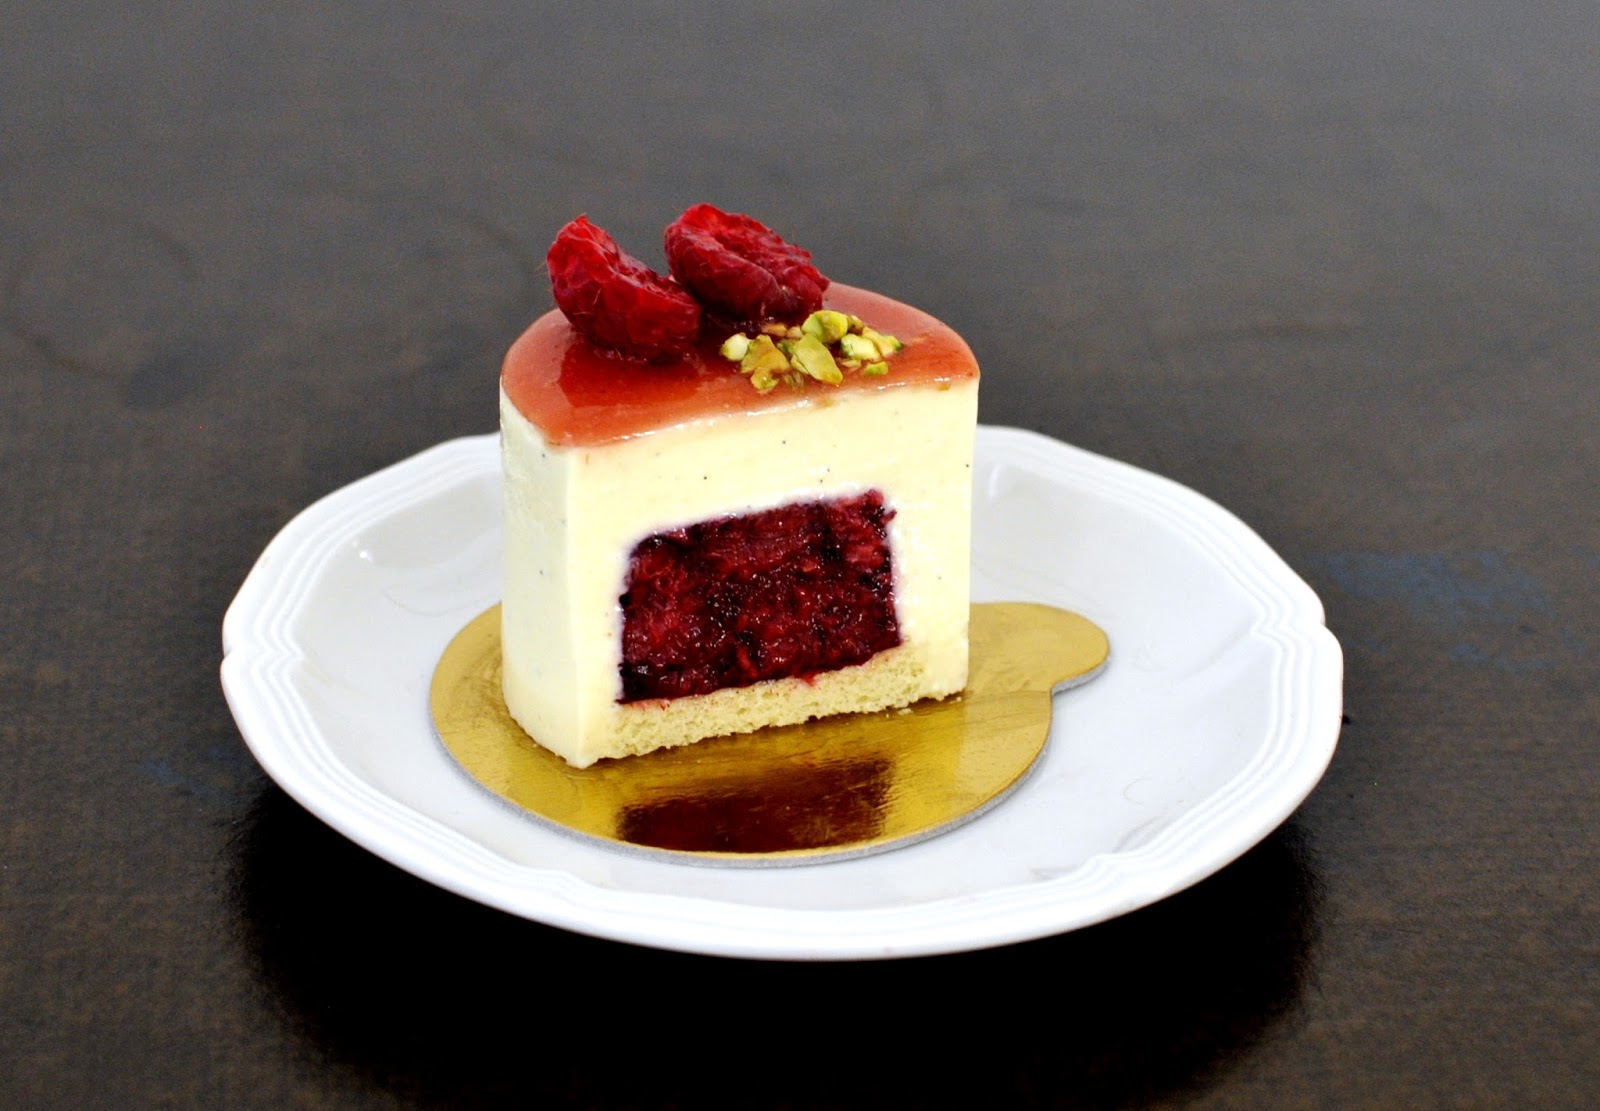
I just had to make a Bavarian Cream with raspberries but I wanted to make little cakes instead of the classic Bavarois.


I love how my petite cakes turned out. The cake do not only look pretty but the cakes have a such a creamy and light consistency. I think my cakes are the perfect dessert for a full course dinner because no one (at least I) wants to end a long evening with a heavy chocolate cake.
My cake creations also reminds me of my childhood. Whenever I visited the opera with my parents, I always requested vanilla ice cream with a hot raspberry sauce during the intermission. I never wanted to have cake but ice cream with raspberry sauce. Over the years this has changed and I prefer cake but next time I visit the opera I will order vanilla ice cream with hot raspberry sauce in order to reminiscing my childhood.


Makes 10 petite cakes (6 cm / 2.4 inches in diameter; 4,5 cm / 1.8 inches in height)

RASPBERRY RAGOUT

  • 300 g / 2 1/3 cups raspberries *
  • 20 g / 1 1/2 tablespoons granulated sugar
  • 3 g / 2 sheets gelatin, soaked
  • Place defrosted or fresh raspberries and granulated sugar into a saucepan and gently heat the mixture until it is warm. Remove the saucepan from the heat, add the gelatin and stir until the gelatin is completely dissolved. 
  • Fill the raspberry ragout into moulds (5 cm / 2 inches in diameter; 2,5 cm / 1 inch in height). Place the moulds into the freezer. Let the ragout freeze for at least 3 hours. 
* I used frozen raspberries since it is the middle of winter where I live. But of course you can use fresh raspberries as well.

ALMOND SPONGE CAKE

  • 30 g / 5 tablespoons almond flour
  • 20 g / 2 1/2 tablespoons powdered sugar
  • 1 egg (medium size)
  • 15 g egg yolk, equals egg yolk of a medium sized egg
  • 30 g egg white, equals egg white of one medium sized egg
  • 1 pinch of salt
  • 25 g / 2 tablespoons granulated sugar
  • 35 g / 5 1/2 tablespoons pastry flour
  • 15 g / 1 tablespoon unsalted butter, melted
  • Preheat the oven to 180 °C / 355 °F.
  • Line a baking sheet with parchment paper. 
  • Place the almond flour, powdered sugar, egg and egg yolk in a medium sized bowl; whisk until creamy. 
  • Place egg white and salt in a small bowl and whisk until almost stiff. Gradually add the granulated sugar and whisk until stiff. 
  • Fold the egg white into the almond flour and egg mixture. 
  • Spread the batter (the size of 25 cm x 25 cm / 10 inches x 10 inches square) onto the baking sheet lined with parchment paper.
  • Bake the sponge cake for 7 to 8 minutes or until the cake is golden in color. 
  • Let the sponge cake cool completely on a wire rack. Carefully remove the parchment paper. Cut out circles with a cookie cutter (5 cm / 2 inches). 

BAVARIAN CREAM

  • 250 ml / 1 cup whole milk 
  • 10 cm / 4 inch piece of vanilla bean
  • 40 g egg yolks, equals egg yolks of 2 1/2 eggs
  • 35 g / 2 1/2 tablespoons granulated sugar
  • 6 g / 4 sheets of gelatin, soaked
  • 230 g / 1 cup heavy cream
  • Prepare a big bowl with ice water. If you do not have any ice cubes on hand, use very cold water. 
  • Pour the milk into a large saucepan. Split the vanilla pod lengthwise and scrape out the seeds (use the tip of your knife or the dull side of the knife). Add the vanilla seeds and the empty vanilla pod to the milk. Bring the milk almost to boil and set aside. 
  • Whisk egg yolks and granulated sugar fluffy. Slowly add the hot milk to the egg yolk mixture and mix well. Pour the mixture back into the saucepan. Heat the mixture over medium heat - stir constantly - until the mixture has reached the temperature of 82 °C / 180 °F to 84 °C / 183 °F. You will notice that the egg yolk mixture has thickened. Remove from the heat; add the gelatin and stir well. Pour the mixture through a sieve into a bowl. Place the bowl into the prepared ice water. Stir until the mixture has cooled (you will also notice that the mixture starts to gelatinize). Remove from the ice water. 
  • Whisk the heavy cream until creamy. Fold the heavy cream into the egg yolk milk mixture. Fill the Bavarian Cream into a piping bag and use immediately. 

ASSEMBLING

  • 100 g red seedless jam / 1/3 cup (I used a strawberry rhubarb jam that I made summer; I passed the jam through a sieve in order to get a smooth texture.)
  • 10 fresh raspberries, cut into halves
  • Roughly chopped unsalted and roasted pistachios
  • Line a board with parchment paper and place cake rings onto the board. 
  • Unmould the frozen raspberry cores. Place the raspberry cores onto the sponge cake circles . I sprinkle on the sponge cake circles a mixture of wheat starch and starch flour which prevents the raspberry ragout soaking through the sponge cake bottom. Place the circles into the middle of each cake ring
  • Pipe the Bavarian Cream into the cake rings. 
  • Freeze the cakes for at least 4 hours. 
  • Dip the cake rings, be carefully not to dip the bottom of the top in water, in hot water for a few seconds in order to unmould the frozen mousse cakes. You can also use a blowtorch which I use for unmoulding the cakes. 
  • Place each petite cakes onto a cake board. 
  • While the cakes are still frozen, spread a thin layer of jam on top of each cake. Decorate each cake with raspberry halves and chopped pistachios. Let the cakes defrost in the fridge. It takes about 2 to 3 hours until the cakes are completely defrosted.

Ever since I made my strawberry lemongrass cakes, I discovered how delicious sablés Bretons cookies are. I am glad that I was indecisive and picky at the same time when choosing the right cake bottoms for my strawberry cakes because otherwise I might not discovered these cookies. I cannot get enough of these luscious, buttery cookies these days and it is hard to resist a sablé Bretons. I probably should not make these cookies so often but I cannot restrain myself baking them. I have the same trouble with cherries at the moment. I am having a hard time to overcome the temptation buying too many cherries. Every time I visit the farmers' market I cannot resist and buy a ridiculous amount of cherries  - more than I can possibly consume - because I cannot resist these luscious red looking little fruits. Hence, I wanted to combine my two current addictions: cherries and sablés Bretons cookies.
I was inspired by this French recipe. Similar to the French recipe I made thick sablés Bretons cookies, topped the cookies with a cheesecake mousse and added a cherry jam between the cookie and the mousse. The result is a relatively light cheesecake mousse that paires so well with the cherry jam and the crunchy and buttery sablés Bretons cookies. It is delicious! It is a wonderful cake for those late summer nights al fresco dinner. 


NOTE: The cakes taste the best on the day of assembling. The next day the sablés Bretons cookies get soft because of the cheesecake mousse. I prepare the cakes in the following order. I make the cherry jam a day before assembling the cakes or a few days ahead if I am busy. I make the sablés Bretons dough a night before I bake the cookies. The next day - usually in the morning - I bake the sablés Bretons cookies. When serving the cakes for afternoon tea, I make the cheesecake mousse in the morning time. When serving the cakes for a al fresco dinner I prepare the cheesecake mousse and assemble the cakes in the afternoon.

 Makes 8 to 10 cakes ( 6 cm / 2.4 inches in diameter; 4,5 cm / 1.8 inches in height)

Sablés Bretons Cookies

  • 75 g / 5 1/2 tablespoons unsalted butter
  • 75 g / 1/3 cup and 1 tablespoon granulated sugar
  • 30 g egg yolks / equals egg yolks of two medium sized egg
  • 100 g / 1 cup pastry flour, sifted
  • 2 g / 1 /2 teaspoon baking powder
  • 1 pinch of salt
  • Mix butter and sugar with a wooden spoon until smooth. Add the egg yolks to the mixture and stir well again. 
  • Mix pastry flour, baking powder and salt in a separate bowl. Add the flour mixture to the butter mixture and stir until all ingredients are well combined. Place the dough between two parchment papers and roll out the dough until it is 7 mm to 10 mm ( 0.3 inches to 0.4 inches) thick. The dough is very sticky, that is why it is the best to roll out the dough between two parchment papers. Chill the dough in the fridge for at least 4 hours or overnight. 
  • Preheat the oven to 170 °C / 340 °F. 
  • Line a baking sheet with parchment paper. Cut out circles with ring molds and place the ring molds onto the baking sheet ( bake the sablés Bretons in the ring molds).
  • Bake the sablés Bretons for 17 to 20 minutes until the cookies have a golden brown color. While the cookies are still warm, carefully remove the rings. Let the cookies cool completely. In the meantime, clean the ring molds.

Cherry Jam

  • 125 g cherry puree * 
  • 115 jam sugar (1:1) **
  • Place cherry puree and the jam sugar in a pot. Bring it to a boil and let it simmer for three minutes. Remove the pot from the heat and pour the jam onto a flat plate. Let the jam cool completely. 
  • You can prepare the jam a few days ahead. Keep the jam in a jar and store it in the fridge. 
* This is how you make your own cherry puree: Puree 150 g / 1 heaped cup pitted sour cherries (you can also use frozen sour cherries) and strain it through a fine sieve. Add about 25 g / 2 tablespoons granulated sugar to the cherry puree. (10 % sugar is added to the fruit puree). 
** This means that a jam sugar is used with equal weights of fruits (or in our case puree) and sugar. If you use a jam sugar 2:1 you need twice as much fruits or puree as jam sugar.

Cheesecake Mousse

  • 75 g / 1/2 cup and 2 tablespoons powdered sugar
  • 65 ml / 1/4 cup lemon juice
  • 100 g eggs / equals 2 medium sized eggs
  • 2 sheets gelatin (3 g), soaked
  • 75 g / 5 1/2 tablespoons unsalted butter, cut into small cubes
  • 145 g / 2/3 cup cream cheese
  • 125 g / 1/2 cup and 1 tablespoon heavy cream
  • Mix powdered sugar, lemon juice and eggs in a heatproof bowl. 
  • Over a double boiler heat the bowl with the mixture - continuously whisk - until the mixture has reached the temperature of 84 °C / 183 °F. You will notice that the mixture has thickened up; remove the boil from the double boiler
  • Add the gelatin and stir until the gelatin has completely dissolved; then add the butter cubes and stir until the mixture is smooth. 
  • Let the mixture cool for a couple of minutes until it is lukewarm. Add the cream cheese and mix well again. 
  • Whip the heavy cream until creamy. Fold in the heavy cream into the mixture. 

Assembling

  • Line a flat plate or a board with parchment paper, place the ring molds onto it and place the sablés Bretons cookies into the rings. 
  • Spread about a teaspoon of cherry jam on each sablés Bretons cookie. 
  • Carefully spoon the cream cheese mousse into the rings and level the surface out. 
  • Let the mousse set in the fridge for 2 to 3 hours. 
  • Carefully remove the ring molds.
  • Keep the cakes in the fridge until you consume the cakes. 
  • Decorate each cake with a cherry. I dip the cherries into cherry puree and then sprinkle the cherries with sugar. This way the sugar will stick to the cherry ( if you dip the cherries into water, the sugar roll off the cherry).


I am aware of the fact that I mention my passion and admiration for French patisserie quite often here on the blog. Many of my recipes are French inspired and I often publish petite cake recipes. It is because I really really like it and I want to share my passion for French patisserie with you my dear readers. I want to share that an amateur pastry chef - such as me - can make pretty looking and of course delicious petite gâteaux. It is not that complicated as it might seem like and it does not necessarily require any special kitchen tools for making little exquisite cakes. The only important thing you need to keep in mind is time. Allow enough time to make the cakes because the cakes - in particular mousse cakes - often need to be in the freezer for a couple of hours. Some petite gateaux takes more time than others but if you plan the preparation time wisely it takes less time than you think.
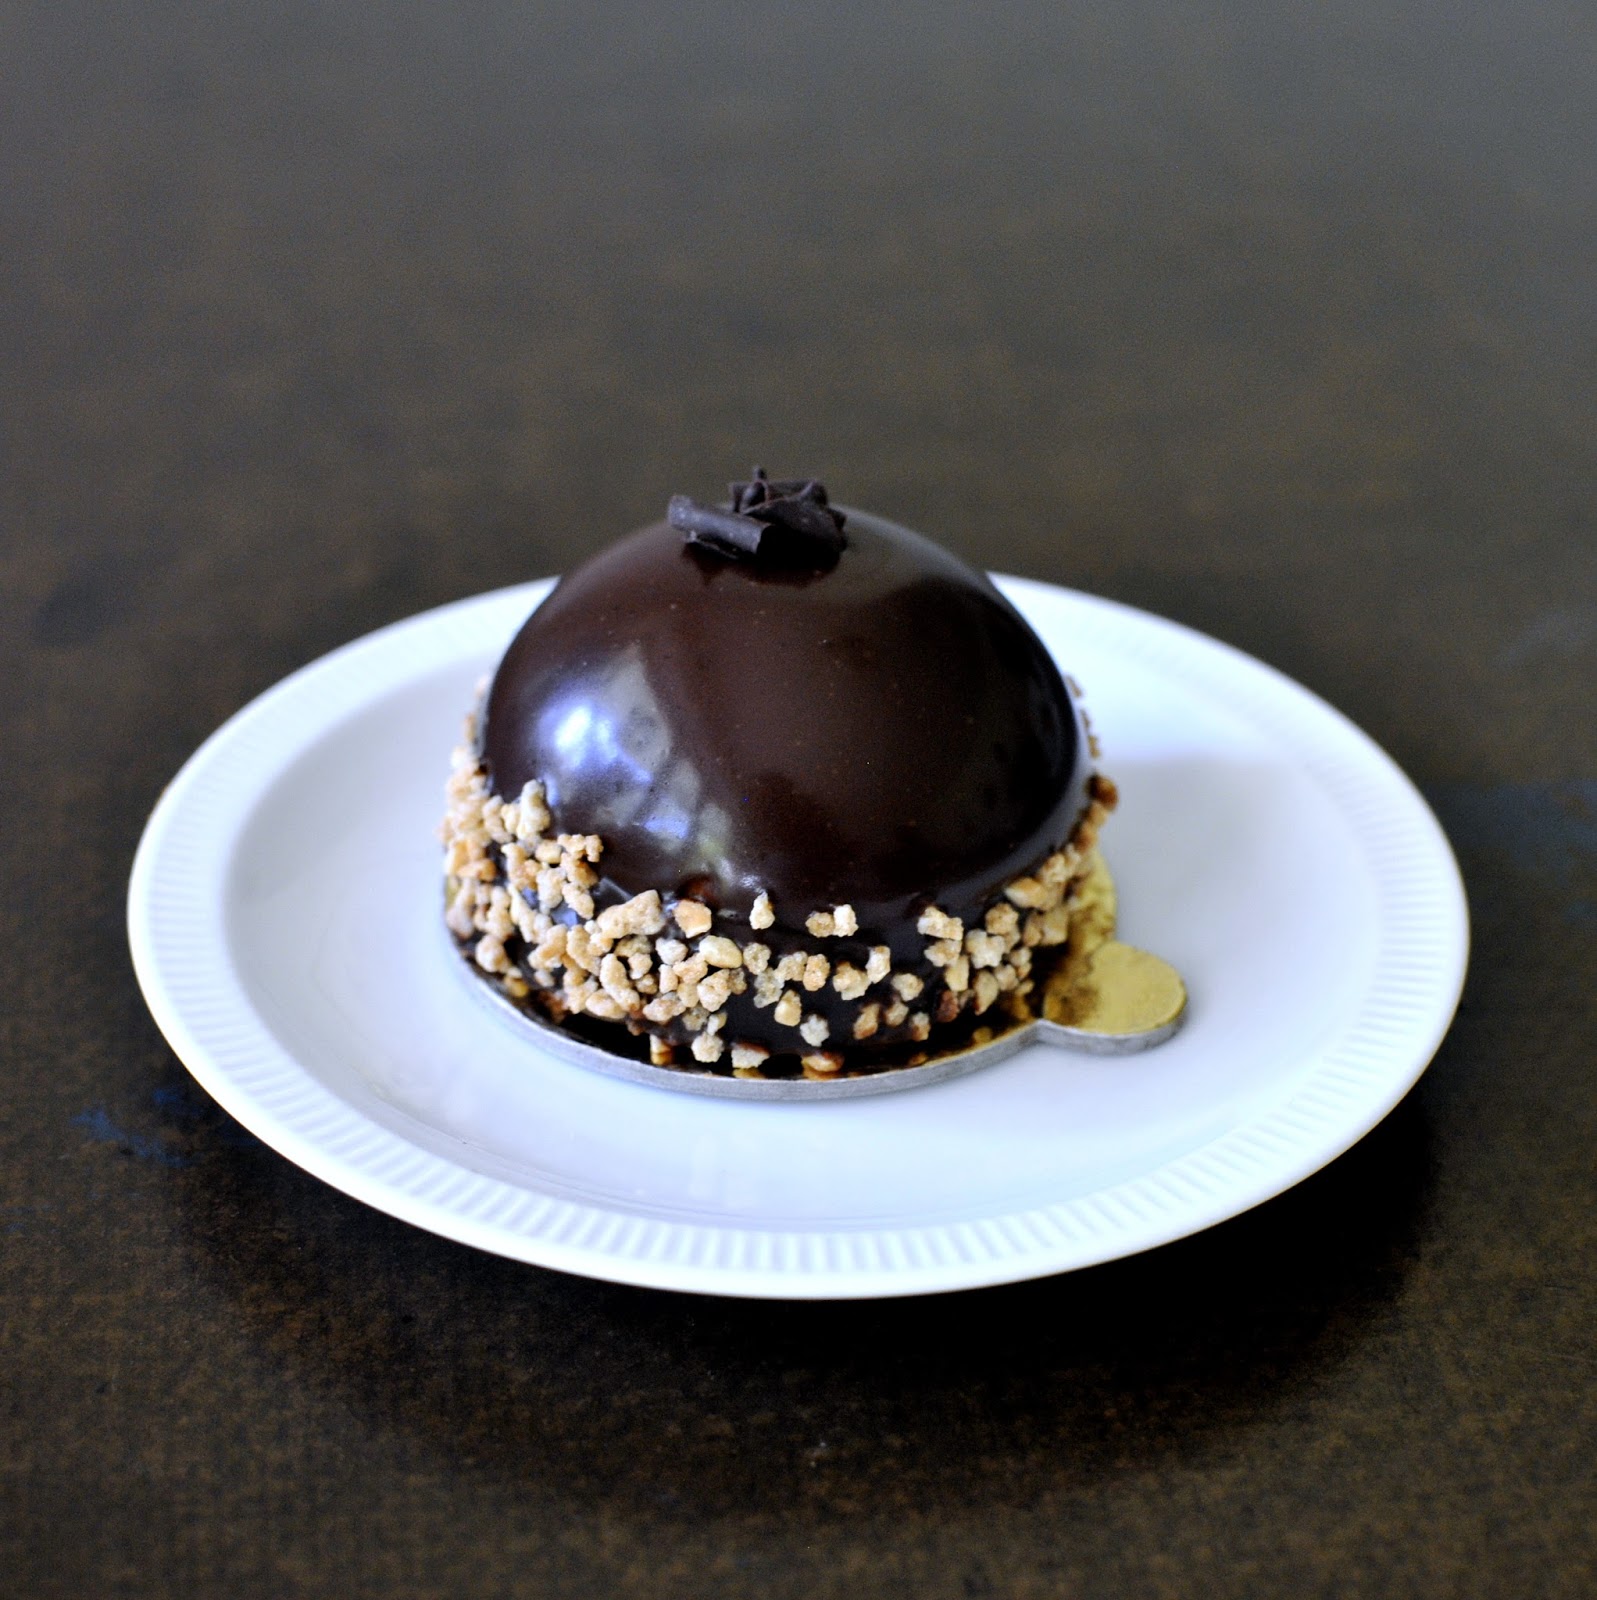
Well, lets talk about the cake I would like to introduce you today: it is a very chocolaty little cake. The cakes consist of a brownie bottom, a very creamy and light chocolate noisette / nougat mousse and a chocolate mirror glaze decorated with ground hazelnut brittle. It is a decadent and definietly rich cake but it is incredible delicious. It is a dream cake for any chocolate lover.
When I made the cakes for the first time I decorated the cakes with ground brittle because I thought it it looked pretty. I still think that the britle makes a beautiful decoration but it is more than decoration. The brittle gives the cake a nice crunch and is a delicious contrast to the creamy mousse and soft brownie bottom. Do not omit the brittle because it is more than decoration.
Happy baking time and bon apétit!


NOTE:  I have difficulties to find the right translation for the chocolate that I am using for the noisette mousse. In German it is called "Nougat", nougat, but is not the white chewy nougat that one might associate nougat with. The German variation of nougat consists of nuts (mostly hazelnuts), sugar, cocoa butter and mass. The consistency is mellow and it is more like a chocolate. I read that this kind of nougat is also called Wiener (Viennese) nougat. If you have a better explanation let me know
I used this noisette chocolate which is a German brand that is in particular known for its marzipan. It might be difficult to get hold of this chocolate. This brand might be easier to find but any German nougat chocolate works. Or feel free to contact me and I can help you out with nougat chocolate.

Update ( 17th August 2016): I got a lovely comment from Pia and she solved my problem. The "German nougat" that I tried to explain is gianduja/ gianduia chocolate. Thank you Pia!

Makes 8 little hemisphere cakes ( 7 cm / 2.75 inches in diameter)

Noisette Mousse

  • 50 g / 2 ounces chocolate (45 -50 %)
  • 75 g / 2 1/2 ounces noisette / nougat chocolate / gianduia chocolate, see my note above
  • 45 ml / 3 tablespoons heavy cream
  • 1 sheet gelatin (1.5 g), soaked
  • 185 ml / 3/4 cup heavy cream
  • Chop the chocolate and nougat chocolate finely. 
  • Pour the heavy cream into a saucepan and bring it almost to a boil. Set the saucepan aside and add the chopped chocolate. Stir until the chocolate is completely melted, then add the gelatin and stir again until the gelatin is dissolved. Pour the mixture into a bowl and let it cool to room temperature. 
  • In the meantime whip the heavy cream until it is creamy. Fold the whipped cream into the chocolate mixture. 
  • Place hemisphere moulds on a flat plate or board. I use moulds that are 7 cm / 2.75 inches in diameter. Fill the hemisphere moulds 2/3 with the mousse. Freeze the moulds for at least 6 hours or overnight. 

Brownie Bottom

  • 100 g / 3 1/2 ounces chocolate (70 %)
  • 150 g / 1 stick butter and 2 tablespoons unsalted butter
  • 145 g / 3/4 cup granulated sugar
  • 1 pinch of salt
  • 1 tablespoon strong coffee, cold
  • 2 eggs (medium size)
  • 75 g / 3/4 cup pastry flour, sifted
  • Preheat the oven to 175 °C / 350 F°. 
  • Line a baking pan with parchment paper or line a baking sheet with parchment paper and place a cake frame on the baking sheet ( the size of the pan: 22 cm x 22 cm / 8.5 inches x 8.5 inches).
  • Place chocolate and butter in a saucepan and melt over low medium heat. Stir occasionally, so the chocolate does not burn. 
  • In the meantime add eggs, sugar and a pinch of salt in a bowl and whisk with an egg whisk for a minute. 
  • Add the butter chocolate mixture (make sure it is lukewarm and not hot) to the egg sugar mixture and mix well. Add the flour to the mixture and stir until the flour is just combined. Do not overmix the brownie batter. 
  • Pour the batter into the prepared baking pan. 
  • Bake the brownie for 8 to 10 minutes. 
  • Let the brownie cool completely. Cut out circles, with a round cookie cutter, in the size of your hemisphere moulds (mine have a diameter of 7 cm / 2.75 inches).

Chocolate Glaze

  • 95 g 3 1/2 ounces milk chocolate
  • 30 g / 1 ounce dark chocolate (70 %)
  • 25 ml / 2 tablespoons heavy cream
  • 10 g / 1 1/2 teaspoons maple syrup
  • 45 ml / 3 tablespoons water
  • 1/3 sheet gelatin (1/2 g), soaked
  • Chop milk and dark chocolate very finely. 
  • Add heavy cream, maple syrup and water in a saucepan and bring the mixture almost to a boil. Set the saucepan aside and add the finely chopped chocolate. Mix until the chocolate is melted and add the gelatin to it. Stir the mixture until smooth. If the mixture is very thick, add a few drops of water and mix again. 
  • If you do not use the glaze right away, pour the glaze into a jar and let it cool to room temperature. Cover the jar with a lit and store in the fridge. You can keep the glaze for a few days in the fridge. If you want to use the glaze right away, let the glaze cool until it is lukewarm. 

Assembling

  • Ground hazelnut brittle for decoration
  • If you made the glaze in advance, place the glaze (it has a very thick consistency) in a saucepan and gently reheat the glaze. If the glaze is too thick (which often happens when stored for a few days in the fridge) add a little bit of water to it. 
  • Pour the glaze into a jug (I use a measuring jug) because than it is easier to pour the glaze over teh cakes. When glazing the cake it is important that the glaze is lukewarm and not hot. 
  • I recommend not glazing all cakes at once. Glaze three or four mousse cakes at a time, so you can make sure that the cakes are frozen. The glaze thickens up over time. If this happens to you, do not worry. Reheat the glaze again. 
  • Unmould the mousse cakes and place each hemisphere cake onto a brownie circle. Place the frozen cakes on a wire rack and place a deep plate under the wire rack in order to catch the excess glaze and so you can reuse the glaze again.
  • Pour the glaze over the frozen the cakes. Make sure that the mousse cakes are frozen when pouring the glaze over the cakes. 
  • Sprinkle the lower part of the cakes with ground brittle. 
  • Carefully place each cake on a cake board and let it defrost in the fridge.  


There is a Japanese tea house in Munich. The tea house is a gift from a tea school in Kyoto as a sign of friendship on the occasion of the Olympic Games which took place in Munich in 1972. Occasionally this tea house offers tea ceremonies and more than a decade ago - while I was still a teenager - I attended a tea ceremony at this tea house. I was mesmerized by this experience and it was the first time that I encountered matcha tea. I had a koicha  -  it is a very thick matcha tea and served only during tea ceremonies - accompanied with a Japanese sweet snack. It was delicious and this was the moment when my love affair started with matcha. A decade ago matcha was an exotic tea and it was not that easy to get hold of good matcha powder. This has changed completely today and matcha became such a trend, "superfood" (such a strange word) and the other day I even saw matcha powder in a drugstore. I am not sure what to think of this hype and I wonder how tea farmers cope with the growing demand of matcha tea.
Even though green tea becomes more popular green tea flavoured sweets and cakes are a rarity, at least in my part of the world. I remember when I travelled to China, it was my first trip to an Asian country, and green tea flavoured sweets, ice cream or cake was very popular and I was very pleased about this as a tea lover. Until today, whenever I receive Matcha flavoured sweets or tea in general, it is very special to me. When I lived in Korea and every time I am travelling to Asia I always choose green tea flavoured sweets as a snack or dessert.


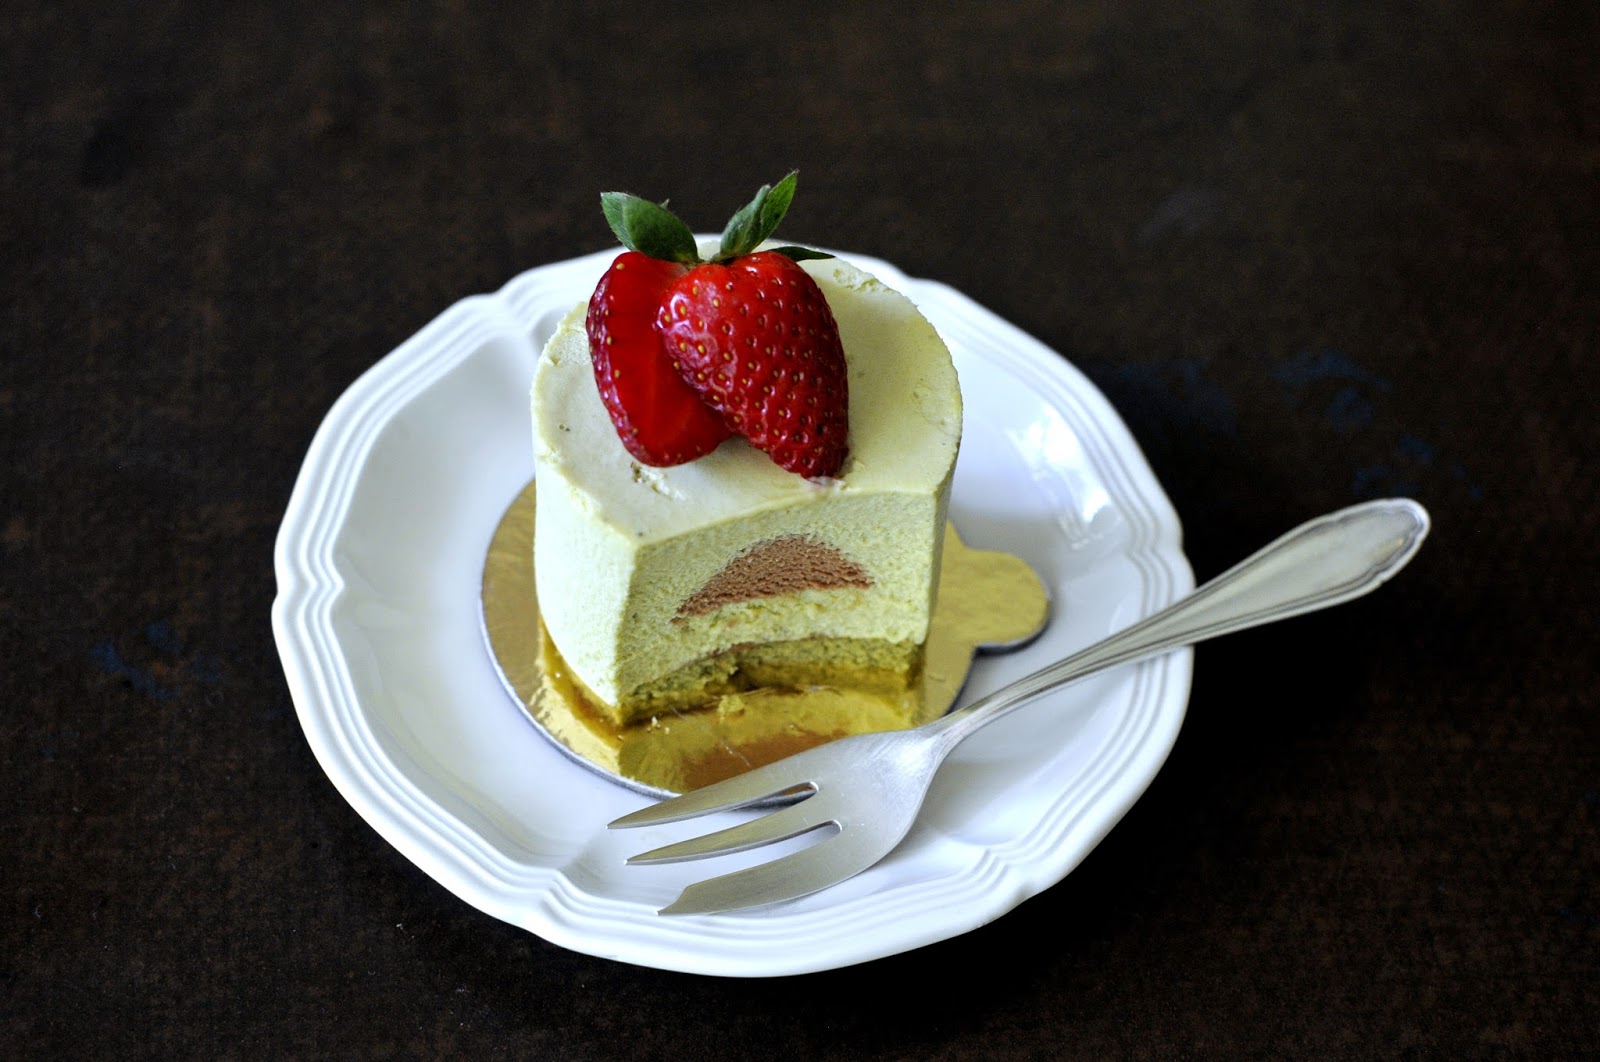
On my last visit to Seoul I ate a matcha cake which consisted of a matcha mousse, a milk chocolate mousse core and a matcha sponge cake bottom, It was an incredible delicious cake and I could not stop thinking about this green tea cake. I had to recreate this matcha mousse cake myself. My first attempts were miserable. This is probably an exaggeration because the cakes tasted good but they did not taste as this particular cake I had in Korea. I wanted to have a very creamy mousse texture but my cakes were not as creamy as the cake I had in Seoul. One day I decided to make a mousse without eggs and that was the aha moment. Et voilà that was the green tea cake that tasted almost as good as the cake I ate in Korea. I got a little bit obsessed with this matcha mousse cake and I ate the cake five days in a row. Today is the first day that I won't eat this matcha cake, because I do not have any cakes left in the freezer, which is probably better for my waistline but I do crave this cake right now. Although there is a lot of heavy cream involved the cake does not feel heavy but have a light texture. I also do not use a lot of milk chocolate in baking because I often find milk chocolate too sweet but in the combination of matcha it is the perfect match. The slightly herb taste of the matcha tea provides the balance to the sweet milk chocolate mousse. I hope you enjoy these matcha mousse cake as much as I am loving these cakes.


NOTE: There is a a very big price (and taste) difference between different matcha powders. For baking do not use matcha powder that is used for tea ceremonies; it is often called ceremonial matcha powder. There is matcha powder which is intended for baking and cooking. It does not mean that the quality of culinary matcha is necessarily lower (though it is cheaper) but the powder is prepared differently.

Makes 10 cakes (6 cm / 2.4 inches in diameter; 4,5 cm / 1.8 inches in height)

Milk Chocolate Core

  • 25 ml / 2 tablespoons heavy cream
  • 5 g / 1 teaspoon granulated sugar
  • 30 g / 1 ounce milk chocolate, finely chopped
  • 55 ml / 4 tablespoons heavy cream
  • 1/2 (0.75 g) sheet gelatin, soaked
  • Place heavy cream and sugar in a small pot and bring it almost to a boil. Set aside and add the finely chopped white chocolate and stir until the chocolate is completely melted. Add the soaked gelatin and stir again until the gelatin is completely dissolved. 
  • Pour the chocolate mixture into a medium sized bowl and let it cool to room temperature. In the meantime whip the heavy cream until creamy. Fold in the whipped cream to the chocolate mixture. Pour the chocolate mixture into small moulds (height: 2,5 cm / 1 inch, 2, 5 cm / inch in diameter). Freeze the moulds for at least 1 1/2 hours. 

Matcha Sponge Cake

  • 2 eggs (medium size)
  • 45 g / 4 tablespoons granulated sugar
  • 25 g / 3 tablespoons almond flour
  • 20 g / 3 tablespoons pastry flour, sifted
  • 1/2 teaspoon matcha powder, sifted
  • 1 pinch of salt
  • Preheat the oven to 190 °C / 375 °F. 
  • Line a baking sheet with parchment paper. 
  • Separate 1 egg. 
  • Whisk one egg, egg yolk and 25 g / 2 tablespoons sugar until fluffy (it takes about 3 to 4 minutes). 
  • Mix almond flour, pastry flour and matcha powder in a separate bowl. Add the flour mixture to the egg mixture. 
  • Whisk the egg white and a pinch of salt until almost stiff. Add little by little the remaining sugar (20 g / 2 tablespoons) and whisk until stiff. 
  • Fold in the beaten egg white into the mixture. 
  • Spread the batter onto the baking sheet (30 cm x 20 cm / 12 inches x 8 inches).
  • Bake the sponge cake for 5 to 7 minutes or until light golden brown in color. 
  • Let the sponge cake cool completely. Cut out circles with a cookie cutter (the size depends on the size of your cake moulds; I cut out 6 cm / 2.4 inches in diameter circles).

Matcha Mousse

  • 150 ml / 2/3 cup heavy cream
  • 10 g / 1 tablespoon granulated sugar
  • 200 g / 7 ounces white chocolate, finely chopped
  • 3 (4,5 g) sheets gelatin, soaked
  • 12 g / 3 teaspoons cooking / baking matcha powder, sifted
  • 350 ml / 1 1/2 cups heavy cream
  • Place heavy cream and granulated sugar into a medium sized pot. Bring the mixture almost to a boil and set aside. Add the finely chopped chocolate to the mixture and stir until the chocolate is completely melted. Add the soaked gelatin and stir until the gelatin is dissolved. Mix the matcha powder with  two to three tablespoons lukewarm water until smooth. Add the matcha paste to the chocolate mixture and mix well. 
  • Pour the chocolate mixture through a sieve to a medium sized bowl and let it cool for a bit. In the meantime whip the heavy cream until creamy. Fold the heavy cream into the matcha chocolate mixture. 

Milk Chocolate Ganache

  • 15 ml / 1 tablespoon heavy cream
  • 30 g / 1 ounce milk chocolate, finely chopped
  • Bring the heavy cream almost to a boil. Add the chopped chocolate and mix until the chocolate is melted. Pour the ganache into a small bowl. 

Assembling

  • Prepare a board or a flat plate with parchment paper and place the cake rings onto the plate. 
  • Place a matcha sponge cake disc into each cake mould and add a dollop of ganache on the middle of each sponge cake disc. 
  • Fill each cake ring two third full with the matcha mousse. Unmould the frozen chocolate cores and gently press the frozen chocolate mousse core into the matcha mousse. Fill up the moulds with the remaining matcha mousse. Freeze the mousse cakes for at least 4 hours.
  • Dip the cake rings for a few seconds in hot water in order to unmold the frozen mousse cakes. Place the mousse cakes on cake boards and decorate each cake with a strawberry or any other fruit to your liking. Defrost the cake at room temperature which takes about an hour. Or you can defrost the cakes in the fridge as well; keep defrosted cakes in the fridge until you consume the mousse cakes. 


When I was in Paris last month I fulfilled a dream a bought myself financier moulds. I already own a silicon financier mould but I wanted to have sturdy financier moulds made out of stainless steel. I was on the hunt for those financier moulds for a very long time but it was impossible to find them anywhere in Germany. As you can imagine I was very happy when I purchased stainless steel financier moulds in Paris. 
Every time it is a special moment when I use a new cake mould for the first time and I am always a tiny bit nervous since I am never sure if I will like the new cake mould. So when I used my new financier moulds for the first time I was nervous but I was excited at the same time. I created a hazelnut chocolate recipe for the inauguration of my new financier moulds and I could not be happier with the result. Traditionally financiers are made with almond flour but I used hazelnut flour instead and I added praline chocolate to the batter as well. This combination is a dream team. I like my hazelnut creation even better than traditional financier that are made with almond flour. The financiers are incredible moist and the nutty aroma harmonizes beautiful with the praline chocolate. 
I am also very, very happy with the financier moulds and finally I can make financiers that look exactly the same as in French bakeries. 
By the way, the rectangular shape of the financiers resemble a gold bar. There is a legend that the financiers were sold in a Parisian bakery, which was located in the financial district, for the first time at the end of the 19th century. The baker Pierre Lucam of this bakery supposedly paid homage to the bankers who often visited his bakery and bought these little cakes and named them for this reason financiers. 
I was inspired using hazelnut and praline chocolate as ingredients by the little cake named "Neptune" from the Parisian pastry store Stohrer. This particular cake is made of a chocolate mousse, a hazelnut core and the cake is covered with a praline chocolate glaze ( I have seen this flavor combination in other Parisian pastry stores as well). The cake was so incredible delicious and because of this cake I got a new appreciation for hazelnuts and I want to use hazelnuts more often as an ingredient in baking. Of course I also want to recreate the "Neptune" cake from the Stohrer patisserie. I like almonds a lot, I use it often in baking and I also like to snack on almonds but hazelnuts were never on my mind but this has changed since my last visit to Paris. Hazelnuts have such a wonderful aroma, in particular when they are roasted. It takes a little bit of time and effort roasting and skinning the nuts but it is worth it. You will be rewarded by the seductive hazelnut aroma and taste.


NOTE: Of course you do not need to own financier moulds in order to make this delicious little cakes. You can use a muffin tin or other little moulds as well. Just make sure that you do not fill the batter high. Financiers are very flat, about 1 cm / 0.4 inch high.
Financier moulds come in all different kind of sizes. The financier moulds that I used for this particular recipe have the following measurements: length: 8.5 cm / 3.3 inches, width: 4.5 cm / 1.8 inches, height: 1 cm / 0.4 inch.

Makes 10 financiers, see my note above

INGREDIENTS

  • 60 g / 3/8 cup hazelnuts
  • 65 g / 5 tablespoons unsalted butter
  • 55 g / 7 tablespoons powdered sugar, sifted
  • 20 g / 3 tablespoons pastry flour, sifted
  • 60 g / 2 (medium sized eggs) egg white
  • 45 g / 1 1/2 ounces praline chocolate, cut into small cubes
  • Powdered sugar, for decoration

DIRECTIONS

  • Preheat the oven to 150 °C / 300 °F.
  • Place the hazelnuts on a parchment lined baking sheet. Roast the hazelnuts for 20 to 25 minutes until the nuts are lightly golden color and the skin of the nuts are blistered.
  • You can also roast the hazelnuts in a dry frying pan (do not add oil) over medium heat and stir constantly, so you do not burn the nuts.
  • Place the nuts in a kitchen towel and remove the loose skins by rubbing against the towel. Do not worry if the skin does not come off of all nuts completely; it does not have to be perfect. Set 15 hazelnuts aside for the decoration. Cut these hazelnuts into halves. 
  • When the hazelnuts are completely cooled grind the remaining roasted hazelnuts.
  • Switch the oven to 180 °C / 355 °F.
  • Butter and flour financier moulds or a muffin tin.
  • Melt the butter in a small saucepan and heat the butter until it turns into a golden brown color and develops a nutty flavor. Set the butter aside and let it cool. 
  • Mix ground hazelnuts, powdered sugar, pastry flour and chocolate cubes in a medium bowl. Make a well in the middle. 
  • Whisk the egg whites lightly until light foam. Add the egg whites to the well of the hazelnut mixture and stir until combined. 
  • Add little by little the melted butter to the mixture and mix well. 
  • Fill the batter into the financier moulds. Decorate each financier with three hazelnut halves (see my photos above). 
  • Bake the financiers for 6 to 8 minutes. Let the little cakes cool completely, remove the moulds. 
  • Sprinkle each financier with powdered sugar. 
  • Store the financiers in an air tight container or cookie tin up to a week. 
  • Bon Appétit!


When I started writing this blog I mostly posted recipe that were quick and easy to make. At that time I was smitten with French patisserie and making petit gâteaux were my favourite cakes to make. However, I was not confident enough sharing it on the blog and I felt embarrassed sharing recipes that are time-consuming and takes more time than making a coffee cake for example. But why should I not share recipes that I am so passionate about? I asked this question myself in the past and I came to the conclusion that I should not restrict myself what kind of recipes that I am publishing. I want to share recipes that I create myself or recreate; I am passionate about sharing (classic) Swedish recipes which are not so known, besides Swedish cinnamon buns; I just want share my passion for baking with you. At the same time this blog is my patisserie diary as well. It is a neat diary (in contrast to my handwritten diary) where I can write down and collect my recipes. It is also a way for me to look back. Maybe I won't be interested in baking in a few years and then this blog is memory of my time that I was so passionate about baking.

 
My drawing of the White Chocolate Mousse Cakes
Even though I am very terrible at drawing I make sketches of my cake creations that I have in my head. I often have a very clear idea how I want the cakes to look and to taste like. Sometimes I am able to implement my cake ideas that I envision, sometimes I fail miserably and sometimes it takes a few attempts. The following recipe took me a few attempts until it corresponded my cake idea.
May I present you my latest cake creation which consists of a white chocolate mousse, a raspberry mousse core and a pistachio sponge cake bottom? Just looking at the cake makes me so incredible happy and hungry at the same time. If heaven exists, than this cake is heaven. 

NOTES:

Pistachio paste

I am relatively new at using pistacchio paste. I ordered a little jar of pistachio paste. My first impression of pistchio paste was very dissilusionting. I made two batches of pistachio sponge cake and I was not impressed at all. It tasted very atifical to me. I assumed that it was 100 % pistacchios paste that I ordered but a closer look taught me that I was wrong. Other ingredients, such as vanilla flavouring, was added to the paste. This was probably the reason why I found the pistachio flavouring artifical. I decided to make my own pistachio paste and I cannot tell you what big difference it makes. Make sure that you use a 100 % pistachio paste when purchasing and if you have the possibility (a powerful food processor) make your own paste.

Cake moulds

I used a silicone muffin pan for this recipe (I used the same one for my Passion Fruit Mousse Cake recipe).
The size of each mould is: 7 cm / 2.75 inches in diameter; the height is: 4 cm / 1.5 inches. I used little silicone moulds for the raspberry mousse cores as well. The size of each mould is: 2.5 cm / 1 inch in diameter; the height is 2.5 cm / 1 inch.


Makes 6 cakes (7 cm / 2.75 inches), *see my notes above

Raspberry Mousse

  • 25 ml / 2 tablespoons milk
  • 15 g egg yolk (medium sized egg)
  • 5 g / 1/2 tablespoon granulated sugar
  • 35 g raspberry purée
  • 1 g gelatin, soaked or 1/3 teaspoon gelatin powder
  • 35 g / 2 tablespoons heavy cream
  • Pour the milk into a small saucepan and bring it almost to a boil. Set aside. 
  • Mix egg yolk and sugar. Slowly pour the milk to the egg yolk mixture and stir. Pour the mixture back to the saucepan. Heat the mixture over medium heat - whisk continuously - until it starts thickening. Remove from the heat; add the gelatin and stir until the gelatin is dissolved. Add raspberry puree and mix well. Pour the mixture into a bowl and let it cool to room temperature. 
  • In the meantime whisk the heavy cream until creamy. Fold the whipped cream to the raspberry mixture. 
  • Pour the raspberry mousse into six small moulds and freeze the moulds for at least 1 1/2 hours. 

Pistachio Almond Sponge Cake

  • 2 eggs (medium size)
  • 1 pinch of salt
  • 45 g / 1/4 cup granulated sugar
  • 10 g / 1/2 tablespoon pistachio paste
  • 25 g / 4 tablespoons almond flour
  • 20 g / 2 tablespoons pastry flour, sifted
  • Preheat the oven to 190 °C / 375 °F. 
  • Line a baking sheet with parchment paper. 
  • Add egg, egg yolk and 25 g / 2 tablespoons granulated sugar to a bowl and whisk until fluffy (it takes about 3 to 4 minutes) and doubled in volume.
  • Add pistachio paste, almond flour and pastry flour and mix until all ingredients are well combined. 
  • Whisk egg white and a pinch of salt until it is almost stiff. Add little by little the remaining granulated sugar (20 g / 2 tablespoons) and whisk until the egg white is stiff. 
  • Fold in the egg white into the mixture. 
  • Spread the sponge cake batter onto the baking sheet (25 cm x 25 cm / 10 inches x 10 inches).
  • Bake the sponge cake for 5 to 7 minutes. 
  • Let the sponge cake cool completely. Cut out circles with a cookie cutter. Cut out the circles which are 2 cm / 0.8 inch smaller than the diameter of the moulds. 

White Chocolate Mousse

  • 55 ml / 1/4 cup milk
  • 15 g egg yolk (medium sized egg)
  • 5 g / 1/2 tablespoon granulated sugar
  • 3 g gelatin sheets, soaked or 1 teaspoon gelatin powder
  • 115 g / 4 ounces white chocolate, finely chopped
  • 155 g / 2/3 cup heavy cream
  • Pour the milk into a small saucepan and bring it almost to a boil. Set aside.
  • Mix egg yolk and sugar well. Pour the hot milk to the mixture and stir. Pour the milk mixture back to the saucepan. Over medium heat, stir continuously, until the mixture starts thickening. Immediately remove from the heat. Add the gelatin and mix until the gelatin is completely dissolved. 
  • Place the finely chopped chocolate into a medium sized bowl. Pour the hot milk mixture over the white chocolate and stir until the chocolate is completely melted and smooth. 
  • Whisk the heavy cream until creamy (not stiff!). 
  • When the chocolate mixture has reached room temperature (otherwise the whipped cream will melt) fold in the whipped cream. 

Assembling

  • 6 fresh raspberries
  • 1 tablespoon raspberry jam (without seeds)
  • 1 - 2 tablespoons unsalted pistachios, roughly chopped
  • Fill the moulds half full with the white chocolate mousse. 
  • Unmould the raspberry mousse cores. Gently press the cores into the mousse. Fill the moulds with the rest of the white chocolate mousse. Place the pistachio circle on top of each cake. Gently press the circle into the mousse, so it is the same level as the mousse. 
  • Freeze the cakes for at least 6 hours or overnight. 
  • Take the frozen mousse cakes out of the freezer; unmould the mousse cakes. 
  • Decorate the cakes. Cut the raspberries into halves and place two raspberry halves on each mousse cake. Add a dollop of raspberry jam on top of each raspberry half. Sprinkle each cake with chopped pistachios.

In the winter months fresh fruit is challenging. I rotate between oranges, apples and pears. I am so looking forward to the moment when I will see stalks of rhubarb poping up at the stalls at the farmers' market as a welcome sign for the spring season. Until then I am making the most of my limited winter options. I used to eat an apple a day most of my life but since last fall season I replaced it with a pear a day. I cannot understand why I never paid more attention to pears in my life before. Pears are such a delicate and delicious fruit.
While I am having a pear every day I try to memorize a new pear species every day. Did you know that more than 5000 pear varieties exist worldwide? I was flabbergasted by the diversity of pears because I only knew a handful of pear varieties. I blame my pear ignorance to the fact that only a handful of pear varities are offered.
One day I hope I will become a pear expert and name you thousands of different pear names. But bare with me. It will take 14 years memorizing more than 5000 names, in case I memorize one new variety every day. Maybe this is not a good idea  and instead I should stick to my passion of baking and share a delicious pear tartlet recipe with you. The following recipe is a rustic tartlet with a delicious almond filling, a crunchy shortcrust dough and pears that are slightly flavoured with ginger powder. I love the pairing of ginger and pears. If you do not like ginger you can of course omit the ginger but if you are unsure about the combination, please give it a try. It is is divine.


NOTES: 
Use pears that are not too ripe. It is the best if the pears are still firm but not hard. If the pears are too ripe the shortcrust becomes not as crispy as with firm pears.
The tartlets taste the best on the day you make them. The next day the tartlets still taste great but the shortcrust might become soft because of the filling. Store the cakes at room temperature (not in fridge!).

Makes 8 tartlets (8 cm / 3 inches in diameter) or 1 tarte (24 cm / 10 inches in diameter)

Pâte Sucrée

  • 100 g / 7 tablespoons unsalted butter, soft
  • 50 g / 1/4 cup granulated sugar
  • 1/2 egg (medium size)
  • 1 pinch of salt
  • 150 g / 1 1/2 cups pastry flour
* I wrote a blog post about my tips and tricks for making pastry dough here.
  • Mix butter and sugar until creamy. Add the egg and the salt and stir well.
  • Add the flour and mix until the dough comes together. On a lightly floured surface knead the dough until smooth. Form the dough to a disc and wrap the dough into clingwrap and let the dough chill in the fridge for at least one hour. You can let the dough chill in the fridge overnight as well.
  • Take the dough out of the fridge and let the dough sit for 10 to 15 minutes at room temperature. In the meantime butter and flour tart rings. On a lightly floured surface roll out the dough until 3 mm / 0.1 inch thick, Cut out circles, gently press the circles into the moulds. Trim away any excess dough with a sharp knife. Prick the bottom of each tartlet with a fork. Place the moulds on a parchment lined baking sheet. Freeze the tart rings for 20 minutes. In the meantime prepare the filling.

Almond Cream (Frangipane)

  • 75 g / 1/3 cup and 1 tablespoon granulated sugar
  • 75 g / 5 tablespoons unsalted butter, soft
  • 1 1/2 eggs (medium size)
  • 75 g / 3/4 cup almond flour
  • 15 g / 2 tablespoon pastry flour
  • 1 bitter almond, optional, finely grated
  • Mix sugar and butter until smooth. Add the eggs and mix well. Add almond flour, pastry flour and bitter almond (optional) to it and stir until well combined.

Assembling

  • 1 teaspoon ginger powder
  • 4 small pears (100 g / 3.5 ounces each pear)
  • 20 g / 1/4 cup almond flakes
  • Powdered sugar, optional
  • Preheat the oven to 180 °C / 350 °F. 
  • Take the tart rings out of the freezer. 
  • Fill the tart rings with the almost cream. Make sure that you do not overfill the tart rings because the filling will rise a little bit. 
  • Peel the pears, cut each pear in half, scoop out cores. Cut each pear half into thin slices. 
  • Place each pear half onto the top of the almond cream. Sprinkle ginger powder on the pear half of each tart ring. Sprinkle with almond flakes. 
  • Bake the tartlets for 20 to 25 minutes or until golden in color. If you make one tart the baking ttime is about 30 to 35 minutes. 
  • Let the tartlets cool completely. Remove the tart rings and dust with powdered sugar if you like.
  • Enjoy the tartlets with freshly whipped cream. 


Last month I saw the Japanese movie "Sweet Red Been Paste", "あん" (An), directed by Naomi Kawase. The movie is about Dorayaki (little pancakes filled with red been paste) which are sold in a tiny bakery in Tokyo, about an elderly lady who was isolated most of her life because of leprosy and who shares her secret recipe of red been paste and above all, the theme of the movie is about social exclusion and the virtue of patience. It is an incredible beautiful and moving movie and one of the best movies that I have seen in a while.
The movie opens with the peak bloom of the cherry blossom season and this picture was not only stuck in my head for a long time but it also brought back memories of my time when I lived in Seoul, South Korea. The cherry blossom season (the cherry trees were brought by the Japanese during their colonisation) last only about a week and during this short period of time the streets that are lined up with cherry trees are full of marshmallowy clusters of cherry blossoms. It is like a fairy tale. It is like a dream. In a blink of an eye the cherry blossom season is over and all of a sudden the ground is covered with the cherry blossoms which resemble feathers. During the cherry blossom season I always got up very early in order to enjoy a morning stroll and admiring the beauty of the cherry blossoms. I wanted to make most of this season, I did not want to miss a single moment of this breathtaking cherry blossom season.


The cherry blossom season did not only show me the beauty of nature but it also taught me how to live. Enjoy the moment and do not wait until tomorrow. This sounds so profane but the cherry blossom season had an impact on me and my way of living. Over the years I got lost and I forgot about it but the opening scene of the "Sweet Red Been Paste" movie was a reminder for me. 
Inspired by the movie, the cherry blossoms, the colors, my memories in Korea I created delicious little cherry vanilla mousse cakes as an homage. I had a specific image in my head how I wanted the compose this blog post and how the cake should taste like. It turned out exactly how I wanted it. This rarely happens to me. It was pure joy composing this blog entry. I hope you enjoy this post and recipe as much as I do. 


NOTES
Patience is a virtue and this also applies making these delightful mousse cakes. You need time making the cakes but the good news is that you can prepare the cake ahead of time and you can make the cake over several days. The preparation time of the cakes is about 90 minutes; the freezing time of the cakes is 7 1/2 hours. 
I always use a kitchen scale and weight my ingredients in grams. I try my best to calculate the ingredients into tablespoons, teaspoons, cups, et cetera, as accurate as possible. But keep in mind that this way of measuring ingredients can never be precise as measuring in grams. I cannot recommend highly enough investing in a kitchen scale. 


Makes 6 little hemisphere cakes (7 cm / 2.8 inches in diameter, height 4,5 cm / 1.8 inches)

Vanilla Core

  • 125 g / 1/2 cup heavy cream
  • 1/2 vanilla bean
  • 30 g / 2 egg yolks (medium sized egg)
  • 10 g / 1 tablespoon granulated sugar
  • 1.5 g sheet gelatin, soaked or 1/2 teaspoon gelatin powder
  • 30 g / 1 ounce white chocolate, finely chopped
  • Pour the heavy cream into a small pot. 
  • Split vanilla pod lenghtwise and scrape out the seeds (use the tip of your knife or the dull side of the knife). Add the vanilla seeds and the empty vanilla pod to the milk. Bring the milk to a boil and set aside. Remove the empty vanilla pod. 
  • Mix egg yolks and sugar. Pour the hot milk to the egg sugar mixture and mix well. Pour the mixture back to the pot. Over medium heat whisk continuously until the mixture starts to thickens which takes about three to four minutes. Remove from the heat. Add the gelatin and finely chopped white chocolate and stir until the chocolate is completely melted. Pour mixture into a bowl and let it cool for a few minutes. 
  • Pour the mixture into small (silicone) hemisphere moulds (3 cm / 1.2 inches in diameter). Place the moulds in the freezer and let the vanilla cores freeze for at least 1 1/2 hours. 

Cherry Mousse

  • 90 g / 2/3 cup frozen sour cherries, unsweetened
  • 35 g / 3 tablespoons granulated sugar
  • 2 g gelatin sheets, soaked or 2/3 teaspoon gelatin powder
  • 15 g / 1 egg yolk (medium sized egg)
  • 145 g / 1/2 cup and 2 tablespoons heavy cream
  • Defrost the cherries. Puree the defrosted cherries and press the cherries through a sieve. You need 55 g / 1/4 cup of pureed cherries. 
  • Add cherry puree and 15 g / 1 tablespoon sugar into a pot and bring it to a boil. Remove from the heat. Add the gelatin and stir until the gelatin is dissolved. Set aside. 
  • Mix egg yolks and the remaining sugar (20 g / 2 tablespoons) in a heat proof bowl. In a double boiler heat the egg mixture, stir constantly. until it has reached 82 °C / 180 °F. Remove the bowl from the double boiler and continue to whisk until the egg mixture has cooled down. 
  • Add a little bit of the cherry mixture to the egg mixture and stir until well combined. Add the rest of cherry mixture and mix again until well incorporated. 
  • Whisk the heavy cream until creamy. Add one third of the whipped cream to the cherry mixture and mix well. Fold the remaining whipped cream into the cherry mixture. 
  • Fill the cherry mousse into hemisphere (silicone) moulds (almost to the top of each mould). 
  • Unmold the frozen vanilla cores and gently press each core into the cherry mousse. 
  • Freeze the mousse cakes for at least 6 hours or overnight. You can also leave the cherry mousse cakes for several weeks in the freezer. 

Financier Bottom

  • 45 g / 3 tablespoons unsalted butter
  • 25 g  / 3 tablespoons powdered sugar, sifted
  • 15 g / 2 tablespoons pastry flour, sifted
  • 30 g / 5 tablespoons almond flour
  • 60 g / 2 medium sized egg white 
  • 30 g / 1 ounces white chocolate, finely chopped
  • Preheat the oven to 180 °C / 350 °F.
  • Line a small rectangular cake pan (20 cm x 20 cm / 8 inches x 8 inches) with parchment paper. 
  • Melt the butter on medium heat until the butter turns to a golden brown color and develops a nutty flavor. 
  • Place powdered sugar, flour and almond flour in a medium sized bowl and stir.
  • Whisk the egg white until they form light foam. Add the lightly beaten egg whites to the flour mixture and stir well. Add little by little the melted butter to the mixture and mix until well incorporated. Add the chopped white chocolate to the mixture. 
  • Pour the batter into the cake pan. 
  • Bake the cake for 10 to 12 minutes or until sligthly golden in color. 
  • Let the financier bottom cool completely. Cut out circles with a cookie cutter; the size depends on the size of your hemisphere moulds. My moulds are 7 cm / 2.5 inches, so I cut out 7 cm / 2.8 inches circles. 

White Chocolate Glaze

  • 55 ml / 1 /4 cup water
  • 25 g / 3 tablespoons granulated sugar
  • 50 g / 2 1/2 tablespoons liquid glucose
  • 3.5 g gelatin sheets, soaked or 1 1/3 teaspoons gelatin powder
  • 35 g / 2 1/2 tablespoons crème double
  • 50 g / 1.5 ounces white chocolate, finely chopped
  • Pour water, glucose and sugar into a small pot. Over high heat bring the mixture to a boil and let it boil until it has reached the temperature of 103 °C / 217 F°. Remove from the heat and add gelatin and crème double and mix. Place the chopped chocolate into a bowl and pour the the hot mixture over the chocolate. Stir until the glaze is smooth. 
  • Pour the glaze into a jar and let it cool to room temperature. Cover the jar with a lid and store it in the fridge ( you can keep the glaze in the fridge for several days). 

Assembling

  • Place the white chocolate glaze into a pot (it has a thick consistency) and gently reheat the glaze.
  • Unmould the cherry mouse cakes and place the frozen cakes on a wire rack (put a deep plate under the wire rack, so you can catch the excess glaze and reuse the glaze). Pour the glaze over the frozen cakes. It is important that the mousse cakes are frozen when pouring the glaze over the cakes.
  • Carefully place each glazed mousse cake onto a financier circle bottom. 
  • Let the mousse cakes defrost.